Java Web Application Starter Template with Spring Boot
Every now and then a developer or team has to work on new web projects, proof of concepts etc. For this they have to create project from scratch and configure it for database connection, security. I am putting together a started Java Web Application project that anyone can use and build on top of it.
Software used in this sample
- Java 1.8
- Spring Boot 1.5.2.RELEASE
- Thymeleaf
- Twitter Bootstrap
- Jquery
You can download the code from Opencodez Git Repository
To get rid of all the boilerplate coding, we are using Spring Boot here to manage all our core dependencies. We will add dependencies for MySQL and C3P0 for better pooling. This is our basic properties file with some global parameters
|
1 2 3 4 5 6 7 8 9 10 11 12 13 14 15 |
spring.datasource.continue-on-error=true spring.main.banner-mode=off spring.thymeleaf.cache=false ####### DATABASE ############## db.url=jdbc:mysql://localhost:3306/demo?useSSL=false db.user=lessroot db.password=lessroot db.driver=com.mysql.jdbc.Driver db.dialect=org.hibernate.dialect.MySQLDialect hibernate.jdbc.batch_size=500 hibernate.show_sql=false hibernate.format_sql=false |
This is a web application so we may have to use css, javascipt. For this we will be using Bootstrap and Jquery. In order to maintain versioning we will use WebJars to provide us versioned bootstrap and jquery js and css files. The dependencies in pom file will look like
|
1 2 3 4 5 6 7 8 9 10 |
<dependency> <groupId>org.webjars</groupId> <artifactId>bootstrap</artifactId> <version>3.3.6</version> </dependency> <dependency> <groupId>org.webjars</groupId> <artifactId>jquery</artifactId> <version>2.1.4</version> </dependency> |
The application will have main navigation and one secured navigation. For Security for now we will use in memory authentication with sample user and password. Below is java web application security configuration class.
|
1 2 3 4 5 6 7 8 9 10 11 12 13 14 15 16 17 18 19 20 21 22 23 24 25 26 27 28 29 30 31 32 33 34 35 36 37 38 39 40 41 42 43 44 |
@Configuration public class WebSecurityConfiguration extends WebSecurityConfigurerAdapter { @Autowired CustomLoginSuccessHandler customLoginSuccessHandler; @Autowired CustomLogoutSuccessHandler customLogoutSuccessHandler; @Override protected void configure(HttpSecurity http) throws Exception { http .authorizeRequests() .antMatchers("/login**").permitAll() .antMatchers("/static/**","/webjars/**").permitAll() .antMatchers("/about").permitAll() .antMatchers("/admin/**").fullyAuthenticated() .antMatchers("/").permitAll() .and() .formLogin() .loginPage("/login") .failureUrl("/login?error") .successHandler(customLoginSuccessHandler) .permitAll() .and() .logout() .logoutRequestMatcher(new AntPathRequestMatcher("/logout")) .logoutSuccessHandler(customLogoutSuccessHandler) .invalidateHttpSession(true) .deleteCookies("JSESSIONID") .permitAll(); } @Autowired public void configureGlobal(AuthenticationManagerBuilder auth) throws Exception { auth .inMemoryAuthentication() .withUser("user").password("password").roles("USER"); } } |
You can see that we are using custom login and logout handlers. We did that so that we can have more control on how user is redirected once he is authenticated. For starter java web application we have simple checked if the user is authenticated or not. But for more advanced need you can put in role based redirection as well.
|
1 2 3 4 5 6 7 8 9 10 11 12 13 14 15 16 17 18 19 20 21 22 23 24 25 26 27 28 29 30 31 32 33 34 35 36 37 38 39 40 41 42 43 44 45 46 47 |
public class CustomLoginSuccessHandler implements AuthenticationSuccessHandler { private RedirectStrategy redirectStrategy = new DefaultRedirectStrategy(); @Override public void onAuthenticationSuccess(HttpServletRequest request, HttpServletResponse response, Authentication authentication) throws IOException, ServletException { HttpSession session = request.getSession(); /* Set some session variables */ User authUser = (User) SecurityContextHolder.getContext() .getAuthentication().getPrincipal(); session.setAttribute("uname", authUser.getUsername()); session.setAttribute("authorities", authentication.getAuthorities()); /* Set target URL to redirect */ String targetUrl = determineTargetUrl(authentication); redirectStrategy.sendRedirect(request, response, targetUrl); } private String determineTargetUrl(Authentication authentication) { if(authentication.isAuthenticated()) { return "/admin/"; } else { return "/login?error"; } } /** * @return the redirectStrategy */ public RedirectStrategy getRedirectStrategy() { return redirectStrategy; } /** * @param redirectStrategy the redirectStrategy to set */ public void setRedirectStrategy(RedirectStrategy redirectStrategy) { this.redirectStrategy = redirectStrategy; } } |
As an addition to our starter project template, we have added an useful interceptor for java request handlers. This handler will make available the controller name and action name in the view. This information can be used in various ways. In our example, we are using it to highlight active links.
|
1 2 3 4 5 6 7 8 9 10 11 12 13 14 15 16 |
public class BaseInterceptor extends HandlerInterceptorAdapter { public void postHandle(HttpServletRequest request, HttpServletResponse response, Object handler, ModelAndView modelAndView) throws Exception { String controllerName = ""; String actionName = ""; if( handler instanceof HandlerMethod ) { HandlerMethod handlerMethod = (HandlerMethod) handler; controllerName = handlerMethod.getBeanType().getSimpleName(); actionName = handlerMethod.getMethod().getName(); } modelAndView.addObject("controllerName", controllerName ); modelAndView.addObject("actionName", actionName ); } } |
and this will be added to our configuration as
|
1 2 3 4 5 6 7 |
@Configuration public class WebConfiguration extends WebMvcConfigurerAdapter { @Override public void addInterceptors(InterceptorRegistry registry) { registry.addInterceptor(new BaseInterceptor()); } } |
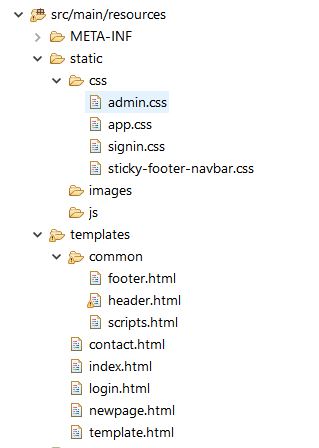
Regarding thymeleaf you can see below the resource structure
We have divided the and made template using common parts of any webpage like header, footer, scripts. You will be able to download the complete code from our github repository.
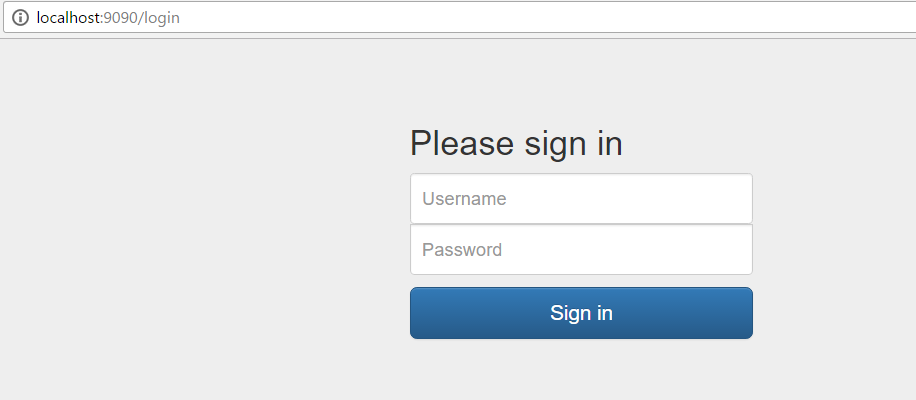
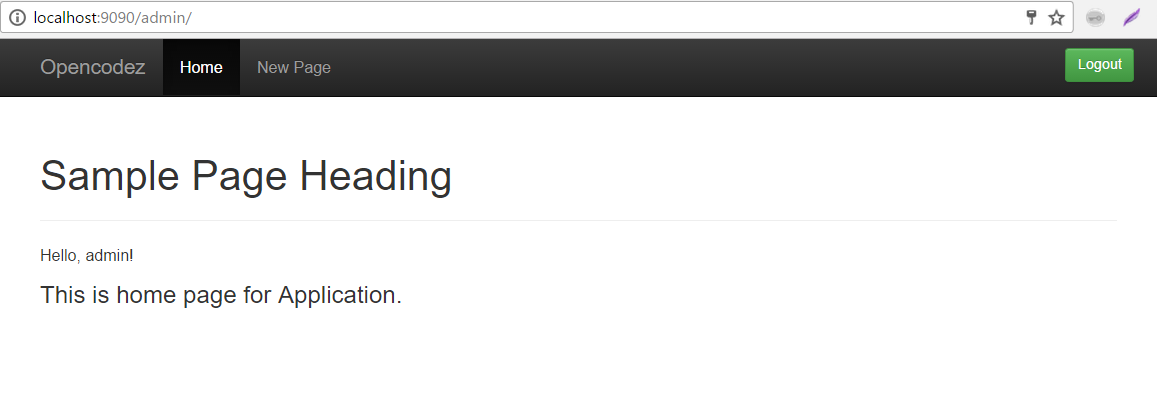
Once setup and run you will see pages like below
Java Web Application Home Page
Login Page
Home page after login
Hope this starter project helps many. Please let me know if you have any queries.


Thanks for this informative read, I have shared it onn Facebook.
Thank you so much !
Keep visiting, Keep learning, Keep Sharing !