Micronaut Framework – Complete Guide with Sample Example
Micronaut Framework is one of the recently introduced JVM-based framework for building lightweight, modular applications and microservices. In this article we will briefly take you through some of the Micronaut features. This framework is introduced at a NFJS conference in 2019. Why would software developers need yet another a microservice framework as there are already lots of options available with them.
What could be so new about Micronaut ? How its different than Spring, Let’s find out the more about it…..
Is another Microservice Framework required?
We already have Spring and Spring Boot for building microservices? Right, Spring and Spring Boot both are used to build microservices. To Spring’s credit, it had to evolve and adapt with all features to continue support for monolith application development while the microservices adoption occurred.
There are many new frameworks able to address trouble areas in older frameworks that had to build-in support for non-microservice application development. Three such areas that Micronaut address are:
- Service Startup
- Memory Footprint
- Processing Throughput
Micronaut is the tool that addresses common challenges and increases developer productivity and satisfaction which is going to make java development easier. Micronaut is an open source framework which is created by Graeme Rocher and his team. The team which built Grails Frameworks
Micronaut is the reactive and lightweight modern JVM framework designed with microservices and cloud computing. With the productive features of GRAIL Micronaut supports Java, Kotlin and Groovy development. As a built tool it supports both Maven and Gradle. It has similar feature like Spring.
Features that makes Micronaut standout differently
- Micronaut is Full-stack polyglot framework which supports Java, Kotlin, & Groovy language and it can use both Apache Maven and Gradle as build tools. Micronaut include all the microservices patterns that developers rely on. For example, Micronaut contain native support for service discovery, distributed configuration, client-side load balancing and authentication.
- Most importantly developers can access various data stores in both blocking and nonblocking ways for client and servers, connect services vai REST HTTP call.
- Micronaut demonstrates a notable improvement in memory usage through reduced use of runtime reflection and reduces external dependencies injection data at compile time. As a result it alleviate excessive startup times and reduces the memory consumption that can hinder application response.
With above all features micronaut becomes a very promising framework which can be used to build the microservice.
Installing Micronaut on Windows
- Download the Micronaut CLI binary from the Micronaut download page. Make sure you select the latest release available for better support.
- Unzip the downloaded binary file into a folder on your system
- Create the MICRONAUT_HOME environment variable with above directory path.
- Update your windows PATH environment variable. You can add the path like : %MICRONAUT_HOME%\bin
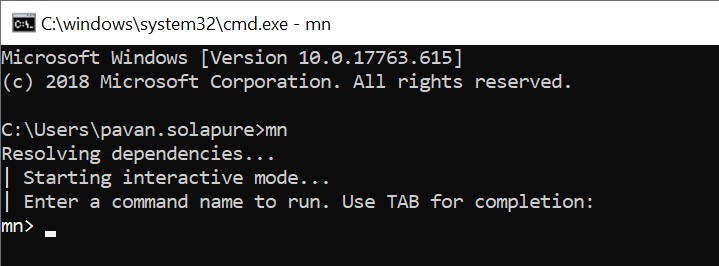
After following above steps, open command prompt and issue command as below-
If you see somewhat above screen that means you have successfully installed Micronaut on your machine and it can be used for project creation.
Below commands can help you to create a working project-
create-app — This command creates an application
create-cli-app — This command creates a command line application
create-federation — This command creates a federation of services
create-function — This command creates a serverless function application
create-profile — This command creates a profile
Micronaut Sample Example : Micro World
We will create a Simple CRUD application. We are creating an app using Micronaut Command line interface (cli). By default it uses gradle, but we will use maven. Run below command –
mn create-app micro-world --build maven
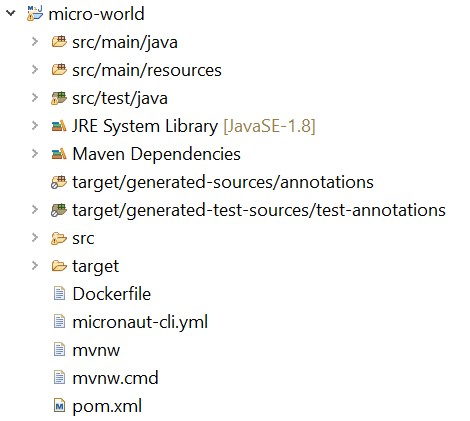
The above command creates a micronaut app with the default package micro-world
Now you can see the folder by name microworld with structure
In order to create a microservice that responds to your command you first need a controller.
Let’s create couple of controllers-
mn create-controller HomeController
mn create-controller PersonController
Our app will be simple CRUD application, we will use a Map to keep our data for demo purpose.
Here are the content of HomeController.java
|
1 2 3 4 5 6 7 8 9 10 11 12 |
package micro.world;import io.micronaut.http.annotation.Controller; import io.micronaut.http.annotation.Get; import io.micronaut.http.HttpStatus;@Controller("/home") public class HomeController { @Get("/") public HttpStatus index() { return HttpStatus.OK; } } |
The class is defined as a controller with the @Controller annotation mapped to the path home.
The @Get annotation is used to map the index method to all the requests that use an HTTP GET
HttpStatus.ok is returned as result.
Lets define our domain object Person.
|
1 2 3 4 5 6 7 8 9 10 11 12 13 14 15 16 17 18 19 20 21 22 23 24 25 26 27 28 29 30 31 32 33 |
package micro.world; public class Person { private Integer id; private String name; private Double salary; public Integer getId() { return id; } public void setId(Integer id) { this.id = id; } public String getName() { return name; } public void setName(String name) { this.name = name; } public Double getSalary() { return salary; } public void setSalary(Double salary) { this.salary = salary; } } |
After this, we will define a dummy service around this domain object.
|
1 2 3 4 5 6 7 8 9 10 11 12 13 14 15 16 17 18 19 20 21 22 23 24 25 26 27 28 29 30 31 32 33 34 35 36 37 38 39 40 41 |
package micro.world; import java.util.ArrayList; import java.util.HashMap; import java.util.List; import java.util.Map; import javax.inject.Singleton; @Singleton public class PersonService { private Map<Integer, Person> database = new HashMap<>(); public void addPerson(Person p) { database.put(p.getId(), p); } public Person getPerson(Integer id) { Person p = database.get(id); return p; } public List<Person> getAllPersons() { List<Person> allPersons = new ArrayList<>(); database.forEach((k,v) -> allPersons.add(v)); return allPersons; } public void updatePerson(Person p) { database.replace(p.getId(), p); } public void deletePerson(Integer id) { Person p = database.get(id); if (null != p) { database.remove(id); } } } |
Now the important part, we write our PersonController.
|
1 2 3 4 5 6 7 8 9 10 11 12 13 14 15 16 17 18 19 20 21 22 23 24 25 26 27 28 29 30 31 32 33 34 35 36 37 38 39 40 41 |
package micro.world; import javax.inject.Inject; import org.json.simple.JSONObject; import io.micronaut.http.HttpStatus; import io.micronaut.http.MediaType; import io.micronaut.http.annotation.Body; import io.micronaut.http.annotation.Controller; import io.micronaut.http.annotation.Get; import io.micronaut.http.annotation.Post; import io.micronaut.http.annotation.Produces; @Controller("/person") public class PersonController { @Inject PersonService personService; @Get("/") public HttpStatus index() { return HttpStatus.OK; } @Post("/add") public HttpStatus addPerson(@Body Person person) { personService.addPerson(person); return HttpStatus.CREATED; } @SuppressWarnings("unchecked") @Produces(MediaType.APPLICATION_JSON) @Get("/get") public JSONObject getPersons() { JSONObject responseObj = new JSONObject(); responseObj.put("data",personService.getAllPersons()); return responseObj; } } |
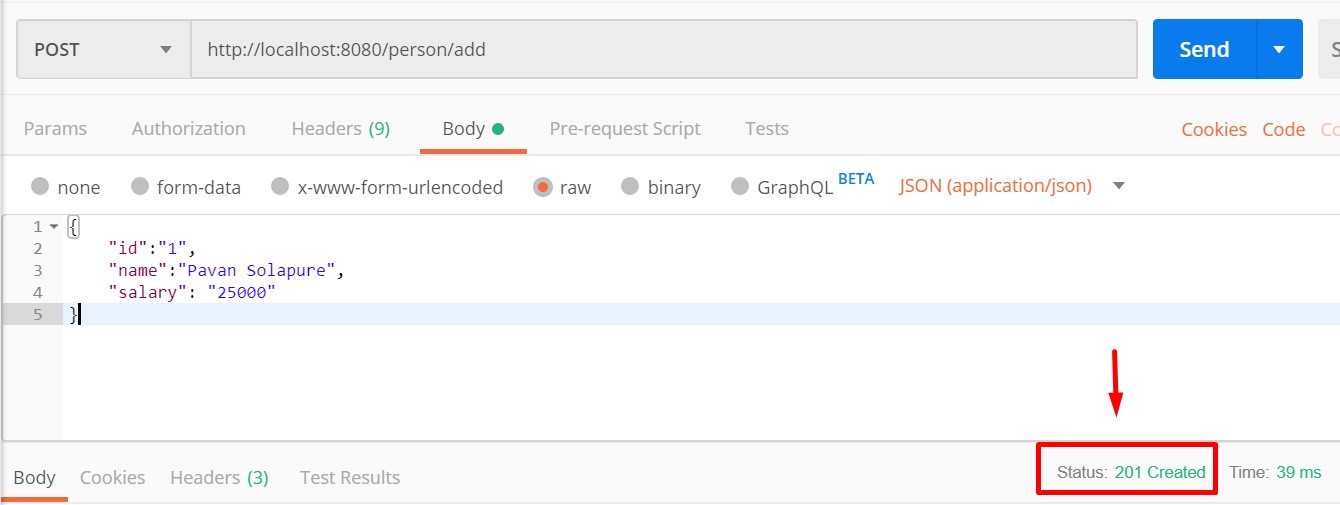
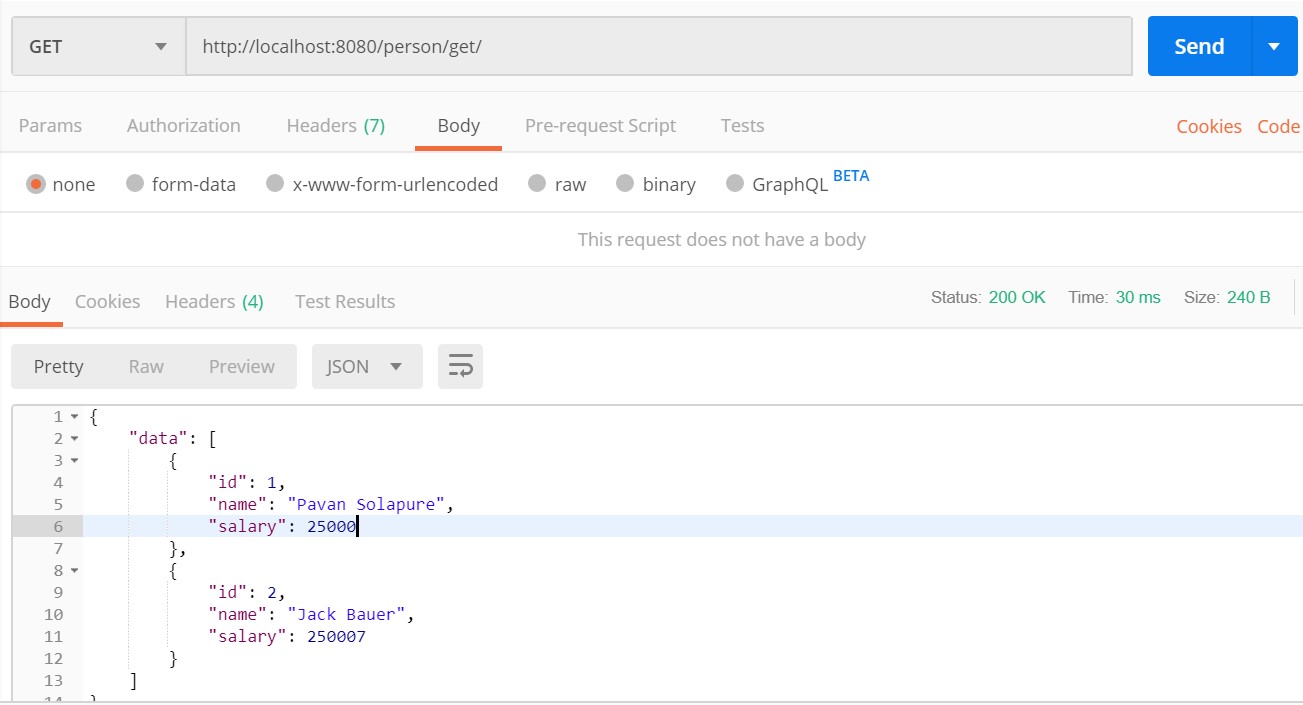
The controller exposes and endpoint /person/add and /person/get. The end points are pretty much self explanatory.
To start the application, run below command
./mvnw compile exec:exec
You can test the application in your browser like 
Similarly, you can check the API in Postman client –
From this small demo application you can see on your own that how simple and fast it is to develop a application using Micronaut.
Conclusion:
Micronaut processing speed is direct impact of fast data access as well as reactive asynchronous invocations. It offers a similar programming model as Spring Boot or, Grails do. Developers coming from those frameworks, who are looking for a framework to use in a distributed architecture, now will enjoy a fast and familiar learning curve.
This will enable you to easily transition from existing application to Micronaut. We have seen the basic of the micronaut features but there are lots to explore. You can also visit the official guide to learn more.


